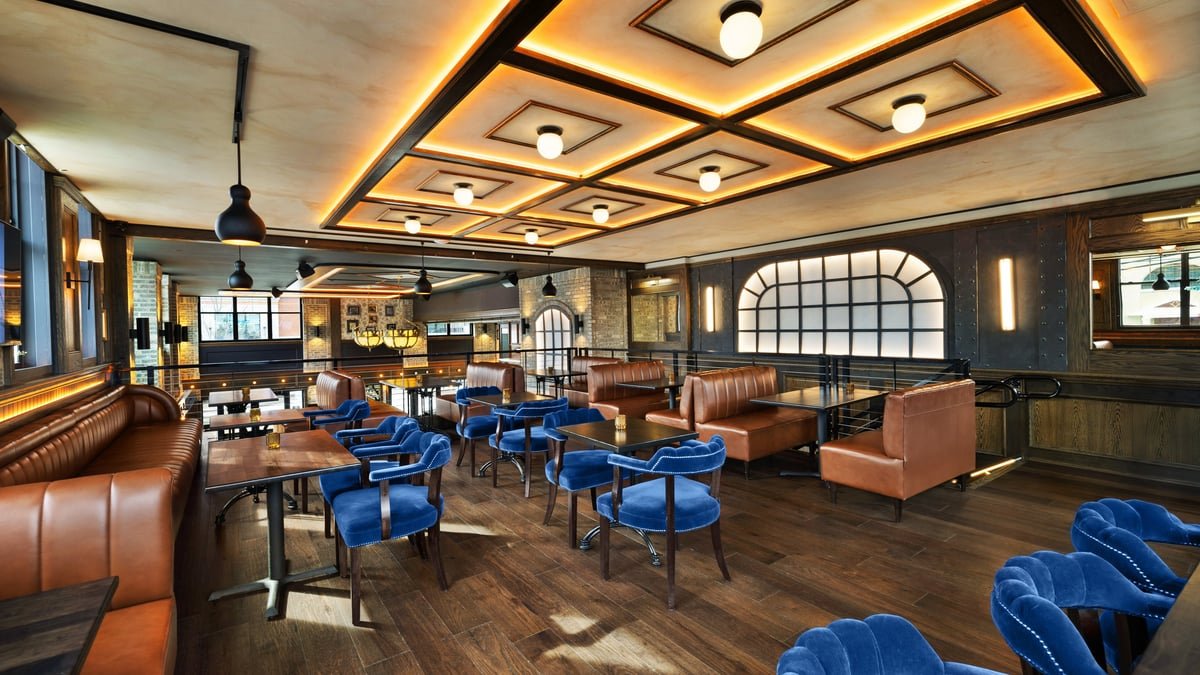
The difference between a good photograph and a memorable one often has little to do with the camera. It begins hours before the first frame is captured, in the quiet work of preparing a space so that it can be seen at its best. For design professionals, a photoshoot is not simply documentation; it is the moment a project becomes a portfolio piece, a magazine feature, or the image that wins the next commission. Thoughtful preparation protects that investment.
The following room-by-room checklist is drawn from years of collaboration with architects, interior designers, builders, and hoteliers. Use it as a framework rather than a rulebook, adapting each step to the character of your space and the story you want the architectural photography to tell.
Before the Shoot: A Foundation of Detail
Great preparation starts with a shared understanding of intent. Before anyone arrives, clarify which spaces matter most, which angles have been imagined, and which details define the design. A brief conversation about the light throughout the day allows the shoot to be scheduled around the hours when each room performs best.
Then attend to the fundamentals that affect every frame:
- Clean windows inside and out, as glass reads clearly in interior photography and smudges are difficult to remove later.
- Replace any dead or mismatched light bulbs so that colour temperature stays consistent across a room.
- Dust surfaces, skirting boards, and light fixtures, since the camera renders detail the eye tends to forgive.
- Remove obvious signs of daily life: chargers, remote controls, cables, and adhesive notes.
- Have a few clean, neutral cloths and a small toolkit on hand for last-minute adjustments.
With these basics resolved, the walkthrough of individual rooms becomes far more efficient.
The Entryway and Circulation Spaces
First impressions carry weight in both a building and its photographs. Entryways, hallways, and staircases establish the rhythm of a project and often appear early in a published sequence.
- Clear the floor of shoes, umbrellas, and mail so the architecture leads the eye.
- Straighten runners and rugs, and check that they sit square to the walls.
- Style consoles with restraint; one considered object often reads better than a cluster.
- Ensure door hardware is clean and doors can be opened to the angle the composition requires.
Staircases
Staircases reward simplicity. Remove anything resting on the treads, wipe down handrails, and consider how natural light falls across the risers. These sculptural elements photograph beautifully when nothing competes with their geometry.
The Living Room
The living room is frequently the anchor of an interior photography set, so it deserves particular attention. The goal is a space that feels lived in yet resolved.
- Fluff and arrange cushions, then angle them so their forms hold rather than slump.
- Fold throws with intention or drape them softly over a chair arm.
- Square coffee table books, and edit accessories down to a few that reinforce the palette.
- Conceal television cables and, where possible, remove the visual weight of a dark screen from the composition.
- Position furniture slightly more open than it sits in daily use, giving the camera room to breathe.
Fresh flowers or a bowl of fruit can introduce life to a room, but keep them seasonal and understated so they support the design rather than dominate it.
The Kitchen
Kitchens are demanding because they hold so many surfaces and small objects. A clear, calm kitchen communicates craftsmanship and quality of materials.
- Clear countertops entirely, then reintroduce only one or two curated pieces such as a board or a single utensil holder.
- Remove magnets, notes, and children’s artwork from the refrigerator.
- Polish taps, splashbacks, and any stainless steel, which shows fingerprints readily.
- Hide dish soap, sponges, and cloths, or set aside a discreet spot to store them during the shoot.
- Check that cabinet doors align and drawers sit flush.
If the kitchen features open shelving, style it thoughtfully. Grouped ceramics and glassware in a limited palette read as considered; a full working shelf can read as cluttered.
Bedrooms
Bedrooms should feel serene and generous. Bedding does much of the work here, so it merits genuine care.
- Iron or steam linens to remove creases, paying attention to pillowcases and the turned edge of a duvet.
- Layer pillows from largest at the back to smallest at the front for depth.
- Clear bedside tables to a lamp and perhaps one small object.
- Tuck away chargers, glasses, and personal items that date the image.
- Check that curtains hang evenly and can be drawn to control the light.
Bathrooms
Bathrooms are small but unforgiving spaces in architectural photography, where every reflective surface reveals its condition.
- Remove all personal toiletries, then style with a few neutral pieces such as folded towels and a single plant.
- Polish mirrors, taps, glass screens, and tiles until they are free of water marks.
- Close the toilet lid and ensure nothing is draped over the radiator or rail.
- Roll or fold towels consistently, keeping colours in harmony with the scheme.
Outdoor and Transitional Spaces
For projects with terraces, gardens, or pool areas, exterior spaces extend the narrative and often become the images that define a hotel or a home.
- Sweep patios, tidy planting, and remove hoses, tools, and bins from view.
- Straighten outdoor furniture and refresh cushions, storing worn pieces out of frame.
- Clean pool surfaces and skim the water so it sits still and reflective.
- Consider the transition between inside and out, as open doors linking the two are among the most compelling frames in interior photography.
A Final Walkthrough
Once each room is prepared, walk the space slowly as though seeing it for the first time. Look for the small distractions that hide in plain sight: a crooked picture frame, a visible thermostat, a reflection of clutter in a mirror. Adjusting the direction of a shade or removing a single object can transform a composition.
It helps to remember that photography compresses a room into a single plane. What feels balanced in person may read differently through the lens, which is why collaboration between the photographer and the design team is so valuable on the day. Trust that process, and be willing to move a chair a few centimetres when asked; those small refinements accumulate into images that feel effortless.
Preparation of this kind is an act of respect for the work itself. The hours spent styling and editing allow the architecture, the materials, and the light to speak clearly, producing photographs that serve your practice long after the shoot ends.
When you are ready to bring a project to life through considered architectural and interior photography, Matthew Lekker Photography would be glad to hear from you.